Thursday, August 19, 2010

What a week!!

Wow this week has been CRAZY!!! I like to have things to do, i like to feel productive, but this week has really given me a run for my money!!

First of all this week was Peyton's birthday(16th)!! He is 4 now!! WOW I can't believe I am saying that it still feels like he is a baby but he's all grown up!!! I try to make there birthday day's special, they don't have to do as much chore wise on that day, they get to pick movies/ TV shows we watch, I make there favorite foods for dinner (candy doesn't count) And they get some kind of cake! This year it was cupcakes with baseballs on top! The boy is crazy about baseball!! It all went well but i was rushing the dinner and "party" because we had to get Zoey into bed at a reasonable time because she started school the next day! WHEW!!


Happy Birthday Big Boy!!


Then the next day(17th) Zoey started her first day of 1st grade!!! She was so excited, they both love school and were happy to go back! Zoey is very independent, and never needs our help, she usually wants to be left alone to do things her self, so the first day of school with her is very uneventful! She just goes about like its no big deal, i try to get excited about it and she just gives me a look like "really mom" so i just let her be her, and wish her well and try not to embarrass her to much! :) LOL


Beautiful!!

The next day(18th) I had to go to the Dr to get a physical for the job i am trying to get. The Dr. is at Gateway in Granite City so I had to drive there which i think stinks, and then the appt. took almost TWO HOURS!!! Man it seemed like i was sitting in that room waiting for the dr. forever!!! Then i had to go fill out more paper work, so i had to have someone pick zoey up from school, then we had to go get her! Oy it doesn't sound like a lot now but when it was happening it was
A LOT!! :)


Also at the same time all this is happening my lovely offspring are suddenly CRAZY!!! They are fighting like you would not believe, aggravating each other, not listening to a word i say, not eating right, they are just NOT RIGHT!!! LOL Anyway i know this is what happens, but right now really?

For the rest of the week i have a Tastefully Simple party on Friday night(if you didn't know already you are invited!), i have a wedding shower to go to on Saturday,and church and Peyton's birthday party on Sunday, and WOOT WOOT i got the job so i start work on Monday!!!
I am totally tired just thinking about it!!

Ok well that's all for now i am off to clean the house and prep meals for the new adventure of having a full time job!!! Wish me lots of luck!!! :)

Friday, August 13, 2010

T-shirt Trunks!!!!

I saw this tutorial over at Nancy's Couture, and you know my love for upcycling, so i have to try this they are sooo cute!!! And i think my little ma will LOVE them!!


What do you do when your son outgrows his favorite t-shirt?
Make boxer briefs out of them!!!!
After many tries I think I got it just right. I have tried to make this so it is as easy as possible but also comfortable for the little man in your life. Overlaping and using a zigzag stitch makes these super comfortable for the little guy.


Supplies Needed:
Trace your back (butt) piece on the front of 1 t-shirt.
I like to line it up so that you can see the picture on his backside.


Cut it out.


Turn your t-shirt over and trace the front (crotch) piece. Cut it out.


Grab the other t-shirt and line up bottom hem on the front and back.
Trace your leg pattern and cut it out.


Take a leg piece and over lap the straight edges 1/4".
The crotch side should be on the top.


Turn leg inside out and sew using a zig zag stitch.
I set my machine stitch length to 3 (medium) and it was perfect.

It should look like this after you sew it.
Repeat with the other leg.

Grab the front and back pieces right side up.


Overlap the short straight edges 1/4". Front piece on top of back piece.

Zig zag stitch using medium stitch length.

Fold with top edges matching.

Mark the middle.

Match leg seam to the mark you just made. Make sure to match the leg back to butt piece and the leg front to the crotch piece. Overlap the leg piece over the back piece 1/4" and zig zag stitch.

Turn and overlap the leg piece over the front (crotch) piece 1/4". Zig zag stitch.
Repeat with the other leg.

Cut the elastic to fit your childs waist. Overlap the edges 1/4" and zigzag stitch.


Mark the middle back.


Line up the seam of the elastic the the middle back. Overlap elastic over the fabric 1/4" and zigzag stitch.
I went over it twice.


Front

Back

If you have any questions or something is unclear please leave a comment and I will help you.
Please use my pattern for personal use only!!!!


UPDATE:
Shannon was kind enough to send me adjustments for upsizing these. Here they are!!!

Just for reference, my youngest (age 5) wears his as printed and your pattern seems to be about a size 4. My older (age 7) wears the upsized and my upsized version seems to be about a size 8.

Upsizing:
Front: Add .5" to top and bottom horizontal lines, Add .25" to vertical lines.
Back: Add 1" to top horizontal line, Add .5" to bottom horizontal line, Add .25" to vertical lines.
Leg: Add 1" to top horizontal line, Add .5" to bottom horizontal line, Add .25" to crotch and butt lines, Add .75" to each of the 2 vertical leg seams.
Marking the "Center": After sewing Front to Back, Lay Front on top of Back with the top Front edge 1" lower than the top Back edge and mark the fold. (So not quite centered)
.
Thank you sooo much Shannon!

Wednesday, August 11, 2010

Wordless Wednesday!!


(Zoey's Tattoos)


(Peyton's Tattoos)

Tuesday, August 10, 2010

Surprise, Surprise!!

Ok today i don't have a craft to post today but i was going to share with you the surprise i had on my table the other day! :)


This little buggy!!!


And these little lovelies!!

Yes i came down to see a yucky bug and two DISGUSTING birds nests on my
kitchen TABLE!!!!

Where are the CLOROX wipes...

Who are you!!

HOOOOOOOOO ARE YOU?
HOOOO HOOOO!

It's Tuesday and it is time to get to know each other better! I love this link party and all the wonderful people that I am getting to know! I know my questions are random, it isn't easy coming up with questions each week!

Here are this weeks questions!

1, What are some of your favorite summer activities?
2. What is your favorite flower?
3. What is your favorite meal of the day?
4. How much time do you spend on the computer each day?
5. Do you have any pets?


Here are my answers!
1, What are some of your favorite summer activities?
I love to go swimming!!! Honestly i haven't swam in six years untill this summer, and i forgot how much i LOVED it!!! :)

2. What is your favorite flower?
I love all kinds of flowers, i just like color on my table, but if i had to choose one i would have to say roses, but the fun colors of them!

3. What is your favorite meal of the day?
My favorite meal is dinner!! I rarely have breakfast, and lunch is always boring, i cznt wait till dinner!!

4. How much time do you spend on the computer each day?
ALOT!!

5. Do you have any pets?
We have a fish, and thats enough!!


Here are the RULES!!!

I can't wait to get to know each other a little better and see what else we have in common besides our craftiness! Here's how it will work, each Tuesday I'll post a few questions. They can be anything from What's your favorite color to What's your favorite movie.
  • You will then copy this week's questions and change the answers to your own.
  • You will post them in a new post on your blog (you can back date this post so it doesn't show up as your newest post) and then come and link up that particular post (not the link to your main blog) here on our link party.
  • Make sure to visit as many blogs as you can and comment! It will be a good way to get to know some fun and interesting things about your fellow crafters!
  • Also add this cute little button to your post so that others can join in on the PARTY!!! (It is over on the left side bar).


Monday, August 9, 2010

Upcycle beauty!!

This is what i have been working on this weekend!! I just love glass of all kinds, but especially clear glass. I don't know what it is but i just love how clean and sparkly it looks!! So when i saw some clear glass plates at a yard sale i HAD to have them! :) And this is what i did with them!!
Aren't they just wonderful!! I'm going to try and sell them at a green craft fair, hopefully people will love them as much as i do!! :) however if no one buys them i guess i can bring myself to keep them!! LOL
Anywho I thought i would make this into a tutorial so you
can make some of your very own!!


First, i cleaned all the glass really well, especially where you are planning to glue them. I used a baby wipe 'cuz lets face it they can clean anything!! Let dry completely.


So i laid out some good 'ol newspaper and got down to business! I used this type of glue, i got it for free at a yard sale, and it works perfect but you can use any type as long as it is going to hold glass permanently!


In this one i used a small wine glass to be the (idk what to call it) pedestal. So i put glue around the rim of the glass and stuck it in the middle of the plate ( i just eyeballed it)!
At this point you can let it dry for awhile, or if you are impatient like me, you can move on!


Next put glue on the bottom of the wine glass, just around the ri
m, and them place the next plate on top, like so!!


Let it dry completely, and poof you have a super wonderful
cupcake/anything stand!!


AAAAAAAAAAAAAAHHHHHHHHHHH!! (can you hear the angles singing? i can)


This one is my new favorite thing!!! :) Isn't it just gorgeous!!??
I have made a few others before this that were not clear and they are awesome too!! I am really thrilled at how all these turned out!!
Have fun making your own!!
If you make one make sure you leave a comment with your link in it so i can see what you do!!

Scoot on over to night owl crafting to see whoos get talent!! :)

Friday, August 6, 2010

Sew Mama Sew is giving away one of these.....


Husqvarna Viking s21 Serger

You can be the lucky winner of this incredible prize if you answer this one question.

How would your life be better with a serger?

Be still my beating heart!!! I have been wanting a serger for EVER!! I have a hand-me-down sewing machine that is at least 20 yrs old, i have no Manuel for it so im really shooting in the dark every time i sew! I know having this AWESOME machine would make my projects really stand out from the crowd! I have so many ideas,but my machine would not do them justice so they just sit in the filing cabinet in my head longing for a day when i have a sewing machine that will make them proud!!!


Thursday, August 5, 2010

Pay it forward!!!

Over at another blog i was reading today, they where talking about paying it forward. they send someone something they have crafted, and then they get something back!! Awesome huh!! just imagine the possibilities of what you could get in your mailbox!! So after i read this i had to join in, and they ask you to share it on you blog,and i was more than happy to pass this fun along!

Anyway, would you like to be in a Pay It Forward? I believe the rules are as follows:
Once you've received your pay-it-forward gift, you have a year to pay it forward to 3 more people. You also need to post this on a blog. The gift can be simple. That's it!

So I guess the first 3 people to e-mail me at ashleyulicni@rocketmail.com can participate and I will send something just as soon as i can, cuz ill be so excited i cant stand it!! :)

Tuesday, August 3, 2010

looking good!


Ok remember yesterday when i told you to come back and see what i was going to do with the jars from the scampi sauce from dinner last night, well here it is! :)

(They looked so good i almost left them like this!)

First i soaked the jars in soapy water to take of the label, then i washed them and made sure all the sticky was off the outside and all the stuff was of the inside,then they had to dry completely.


Then i took acrylic paint and squeezed some on the inside of the jars, put on the lids, and shook them really hard to get the paint all moved around inside. It takes FOREVER to dry but i think they are cute like this too!


This is the end result! Not perfect i know but still cute! I tried to stencil the outside but it just was NOT working so i gave up on that and just painted them, and im not an artist so they aren't that great but oh well they are done! :)
Hope you enjoy!

A present for you

Awesome giveaway over at From the kitchen of: Mrs. Bettie Rocker!!!


Ok faithful groupies. It’s giveaway time! CSN Stores has offered to sponsor a giveaway for my readers. One of you will win a $40 gift certificate good at any of their stores. (They have 200+ online stores that sell just about anything you could want or need… everything from dining room furniture to the tableware to go on it.

Visit http://csnstores.com/ to see all the fun ways you could spend that $40 gift certificate.

You could get something like this


Or even this


This giveaway is ONLY open to US and Canadian readers. I will randomize the winner a week from today, on August 10th!


To enter: You must be or become a follower and leave a comment on this post with your email address.

For an extra entry:

  • Become a fan on Facebook using that little doo-hickey on the left. Comment letting me know you’re a fan.
  • Mention this giveaway in a blog post of your own. (Just toss the link on your entry comment)
This is such a cute skirt i had to share it! Leanne was actually featured on Ucreate today and now she is on my blog, cuz i just had to show you how talented she is!! :)


My name is Leanne and creator of the blog Elle Apparel. I am married to my high school sweetheart and mother to my one-year-old son, Bradley. I started Elle Apparel to sell my hair accessories and aprons, and it has become an outlet where I can post tutorials of the clothing, home décor, etc. that I create. Enjoy this tutorial and feel free to stop by my blog to see more tutorials and accessories I have for sale in my shop.

One thing that you should know about me is that I rarely use a pattern when I make clothes. Patterns give me the heebie jeebies and make me all nervous and sweaty. I’d rather figure out how to make something on my own, and measure it to my body so that I get it to fit just how I want.


For my tutorial today, I am showing you how to make my Pinwheel Skirt.


Lets get started….
You will need:

  • 2 yards of fabric (make sure you chose fabric that hangs nicely. I used a linen for this one)
  • (optional): 4 yards of lace or cute trim
  • Zipper
I’ll give you the step-by-step instructions using my measurements, but just remember to substitute your own measurements.

(*note: s.a = seam allowance)

Waistband:


1. Measure the entire circumference of your waist


2. Add 1” to the length for a 1/2” seam allowance per side.


3. My waistband was 3” thick, but you can decide how thick you want it to be. Add the thickness that you want plus 1” to the width for a 1/2” seam allowance for the top and bottom.


4. Cut 2 waistbands with these measurements.

My waistband measured:
3” X 31” + Seam Allowance (1” X 1”) = 4” W x 32” L


Back:


1. Measure the length at the bottom of where you want your waistband to hit down to your knees.

2. Measure your waist at the bottom of there you want your waistband to hit. Divide this number by 4. There will be 2 separate back panels that meet up in the middle of your back, so this will give us the measurements for the width of those 2 panels.

3. Each panel will have a pleat, so you will need to add 8” to the width of each of the two back panels.

4. Add 1” to the width of each panel for a ½” seam allowance per side.

5. Add 1 ½” to the length of each panel for a ½” seam allowance on top and 1” hem on the bottom.

My 2 back panels each measured: 18”W x 22 ½”L

Width- 9” + 8” (for pleat) + 1” (for ½” s.a. per side) = 18”

Length- 21” + ½” (for top s.a.) + 1” (for bottom hem) = 22 ½”


Front:


1. Measure the front portion of your waist at the bottom of where you want your waistband to hit.

2. For the bottom width of the front piece, add 5” so that it flares slightly at the bottom.

3. Add 1” to the width of your front piece for a ½” seam allowance per side.

4. Add 1 ½” to the length for a ½” seam allowance on top and 1” hem on the bottom. (this length should be the same length as your two back panels.)

My front piece measured:
16” top width, 21” bottom width x 22 ½” L

Top width- 15” + 1” (for ½” s.a. per side) = 16”

Bottom width- 15” + 5” + 1” (for ½” s.a. per side) = 21”

Length- 21” + ½” (for top s.a.) + 1” (for bottom hem) = 22 ½”


Side Triangles:


You will need 4 triangles for the front ruffles on the skirt. The easiest way to do this is to cut out 2 rectangles and then cut them diagonally.

The long straight side of the triangle needs to be a few inches longer than the length of the skirt, because it will be tucked up into the hem.

The width of the top of each triangle needs to be about 1 ½ times the width of the front of the skirt.

For my triangles:
I cut 2 rectangles that measured 23” W x 26” L.
· To get the width, I took the width of the front of my skirt, 16”, and added 7”.

· To get the length, I took the length of the skirt, 22 ½, and added about 4”)

Then I cut each of them on the diagonal, giving me 4 triangles the same size.

Once you have all of your pieces cut out, you are ready to start assembling the skirt.


1. Sew the 2 waistbands together along the top with a ½” s.a. Press seams open, place wrong sides together, and iron flat. Set aside.


2. Take 2 of your triangles and place one on top of the other so that all sides meet up. Sew a ¼” s.a. along the side and the diagonal, leaving the top section open. Repeat this step with the remaining 2 triangles.

*note: I accidentally sewed the top section of the triangle instead of the side, so don’t follow my example.


3. Miter the corners of the triangles. Flip both triangles inside out so that the right sides face out and iron flat.

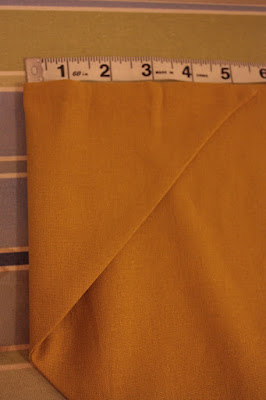
4. Take the top corners of your two triangles (where the shorter edge and the diagonal meet), and fold them back 5 ½”. Set aside.


5. Take your 2 back panels for the skirt. Along the top of the width of your first panel, place a mark 3” in from the left side of your fabric. Then mark 11” in from that same side.

6. With your second panel, do the same thing except place a mark 3” in from the right side. Then mark 11” in from that same side.


7. Fold each back panel so that the 2 marks on each panel meet to create a pleat. Iron flat only at the top of the pleat and pin in place.

8. Sew along the top of each pleated panel ¼” away from the top to secure the pleat. Set aside.


9. Take your 2 triangles and pin the long sides of each triangle to the sides of the front skirt piece. Make sure all top and side edges line up.


10. Mark the center point on the top of the front skirt piece, and pin each top corner of your triangles in the middle.


11. Now with all of the excess fabric in your triangles, create 3 pleats about 2” apart. I had enough fabric to tuck under each pleat 1 ½”.

12. Create 2-3 tiny pleats with the top two small triangles. Mine were only tucked under ½ - ¼ inches.


13. Sew along the top of the front portion of the skirt with a ¼” seam. This will connect the triangles to the front of the skirt and hold the pleats in place.


14. Line up the front section with the 2 back sections, with right sides together. Remember that the sides of the back panels are the furthest away from the pleat. Pin both sides together and sew with a 1/2" s.a. Stop sewing when you get 5” from the bottom of the dress.


15. Move the bottom of the triangles out of the way, and hem the skirt by folding under ½ ”, then ½ ” again.


16. Fold the bottom ends of the triangle under the skirt, letting the triangles hang 1” longer than the hem. Pin in place.


17. Finish sewing the bottom 5" of the side seams with the ends of the triangles folded under.


18. Sew the side seams together with a ½” s.a. and serge or zigzag stitch along the side seams to keep from fraying. Do the same thing to each side of what will be the back center seam.


19. Open up the waistband and pin one side of the waistband all along the top of the skirt, with right sides together. The opening of the waistband will be in the center of the back, lining up with the center of the two back panels.


20. Sew the waistband to the top of the skirt with a ½” s.a.


21. Flip the waistband over so that the right side is facing out and iron flat. Fold the remaining raw edge under 1/4" and sew around the bottom and the top of the waistband very close to the edge to give a finished look.

22. Now it is time to insert your zipper. Sew the back of the skirt together (right sides together) with a ½” seam, but remember to switch to a basting stitch the length of your zipper when you get to the top.

23. Insert your zipper. I used this tutorial.

Voila!! Your Pinwheel Skirt is now complete!


Bow sold here